Step 1: Create a Facebook/Meta developer account
Don't have an account?
If you don’t have a Facebook/Meta developer account - Create a developer
account here
Sign into your account
Once you have logged into your Facebook/Meta developer account. Go to the
“My Apps” page https://developers.facebook.com/apps
Step 2: Create a business app
You will need to create a meta business app. If you already have an app you want to use, you can skip and proceed to step 3. Learn to create a business app hereStep 3: Setup Webhook Configuration
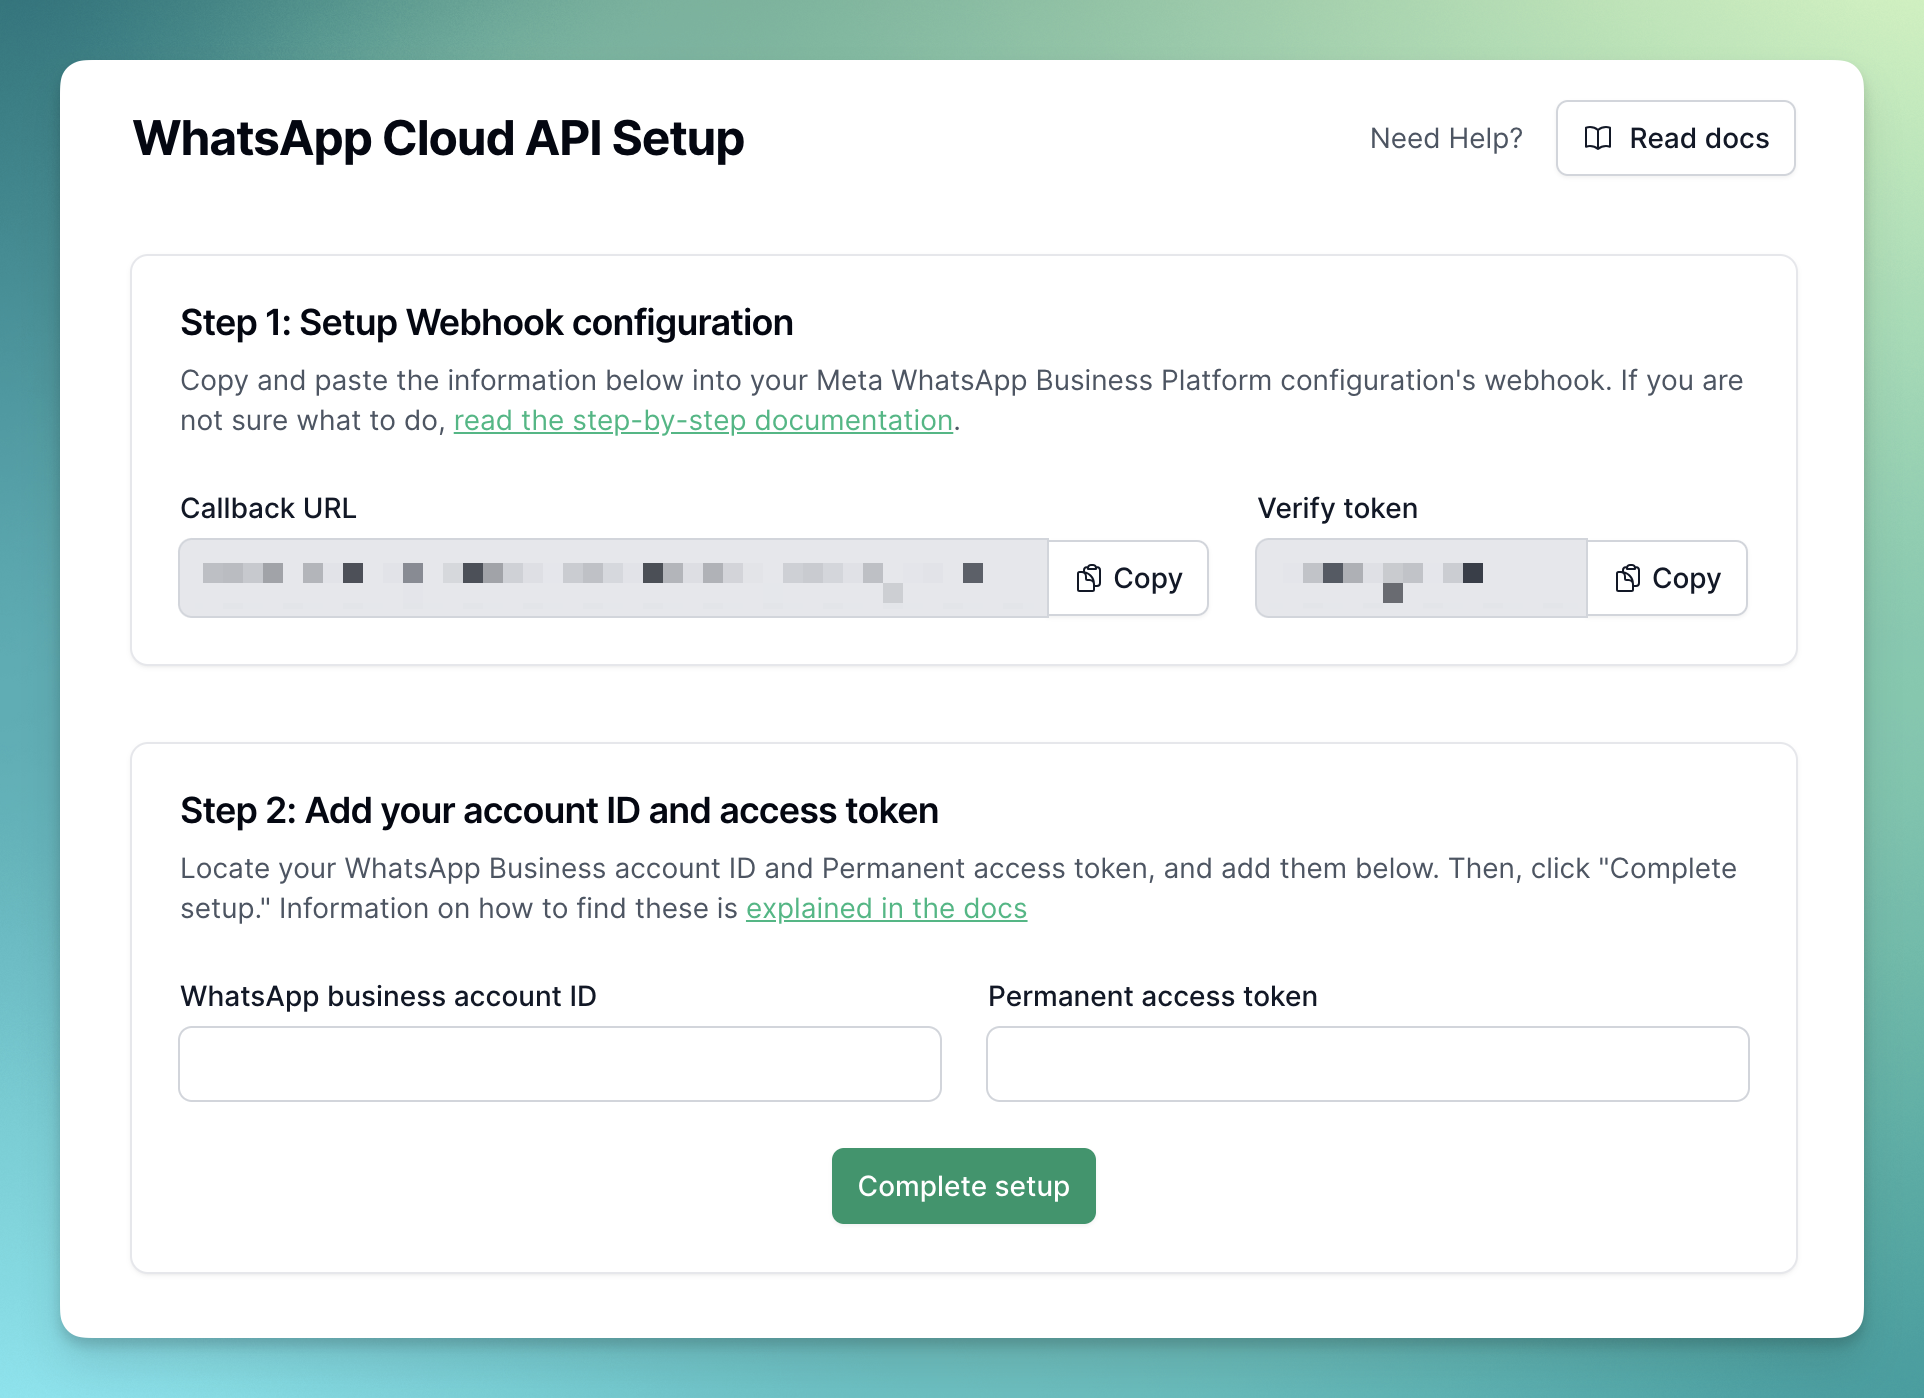
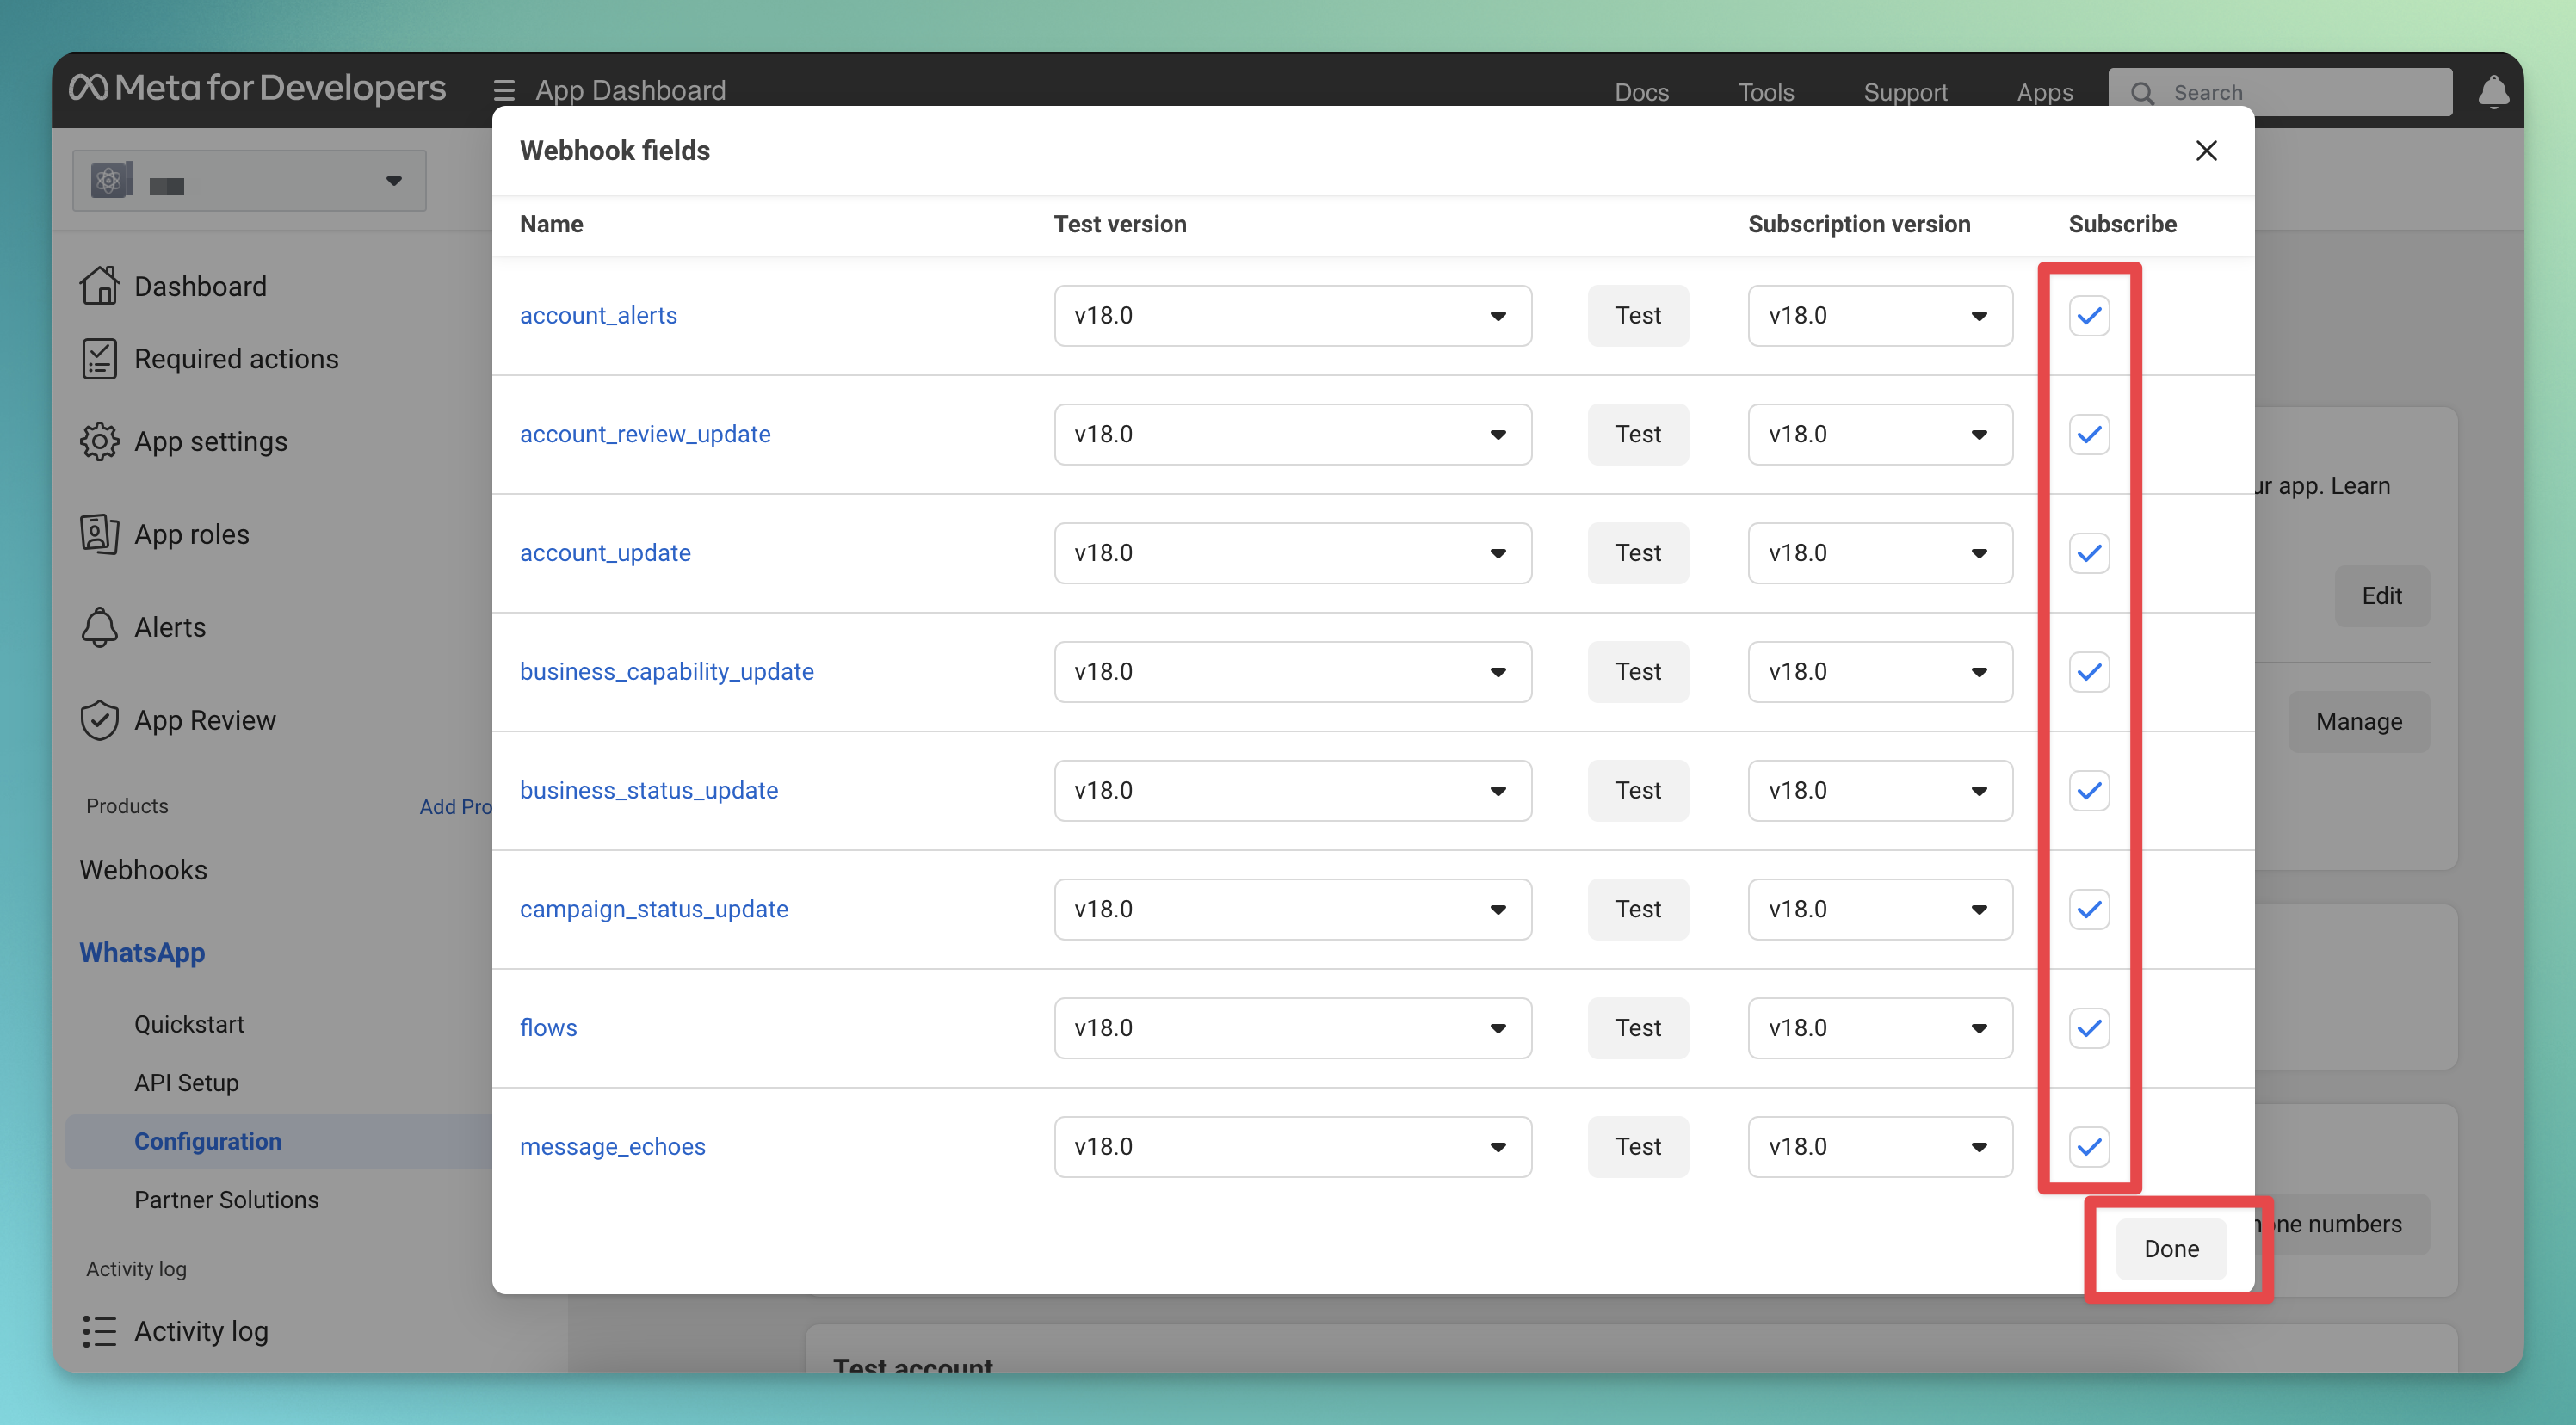
From your app dashboard, select WhatsApp -> Configuration, and enter the callback URL and verify token values from your application’s WhatsApp setup page (this page is shown in the first image above).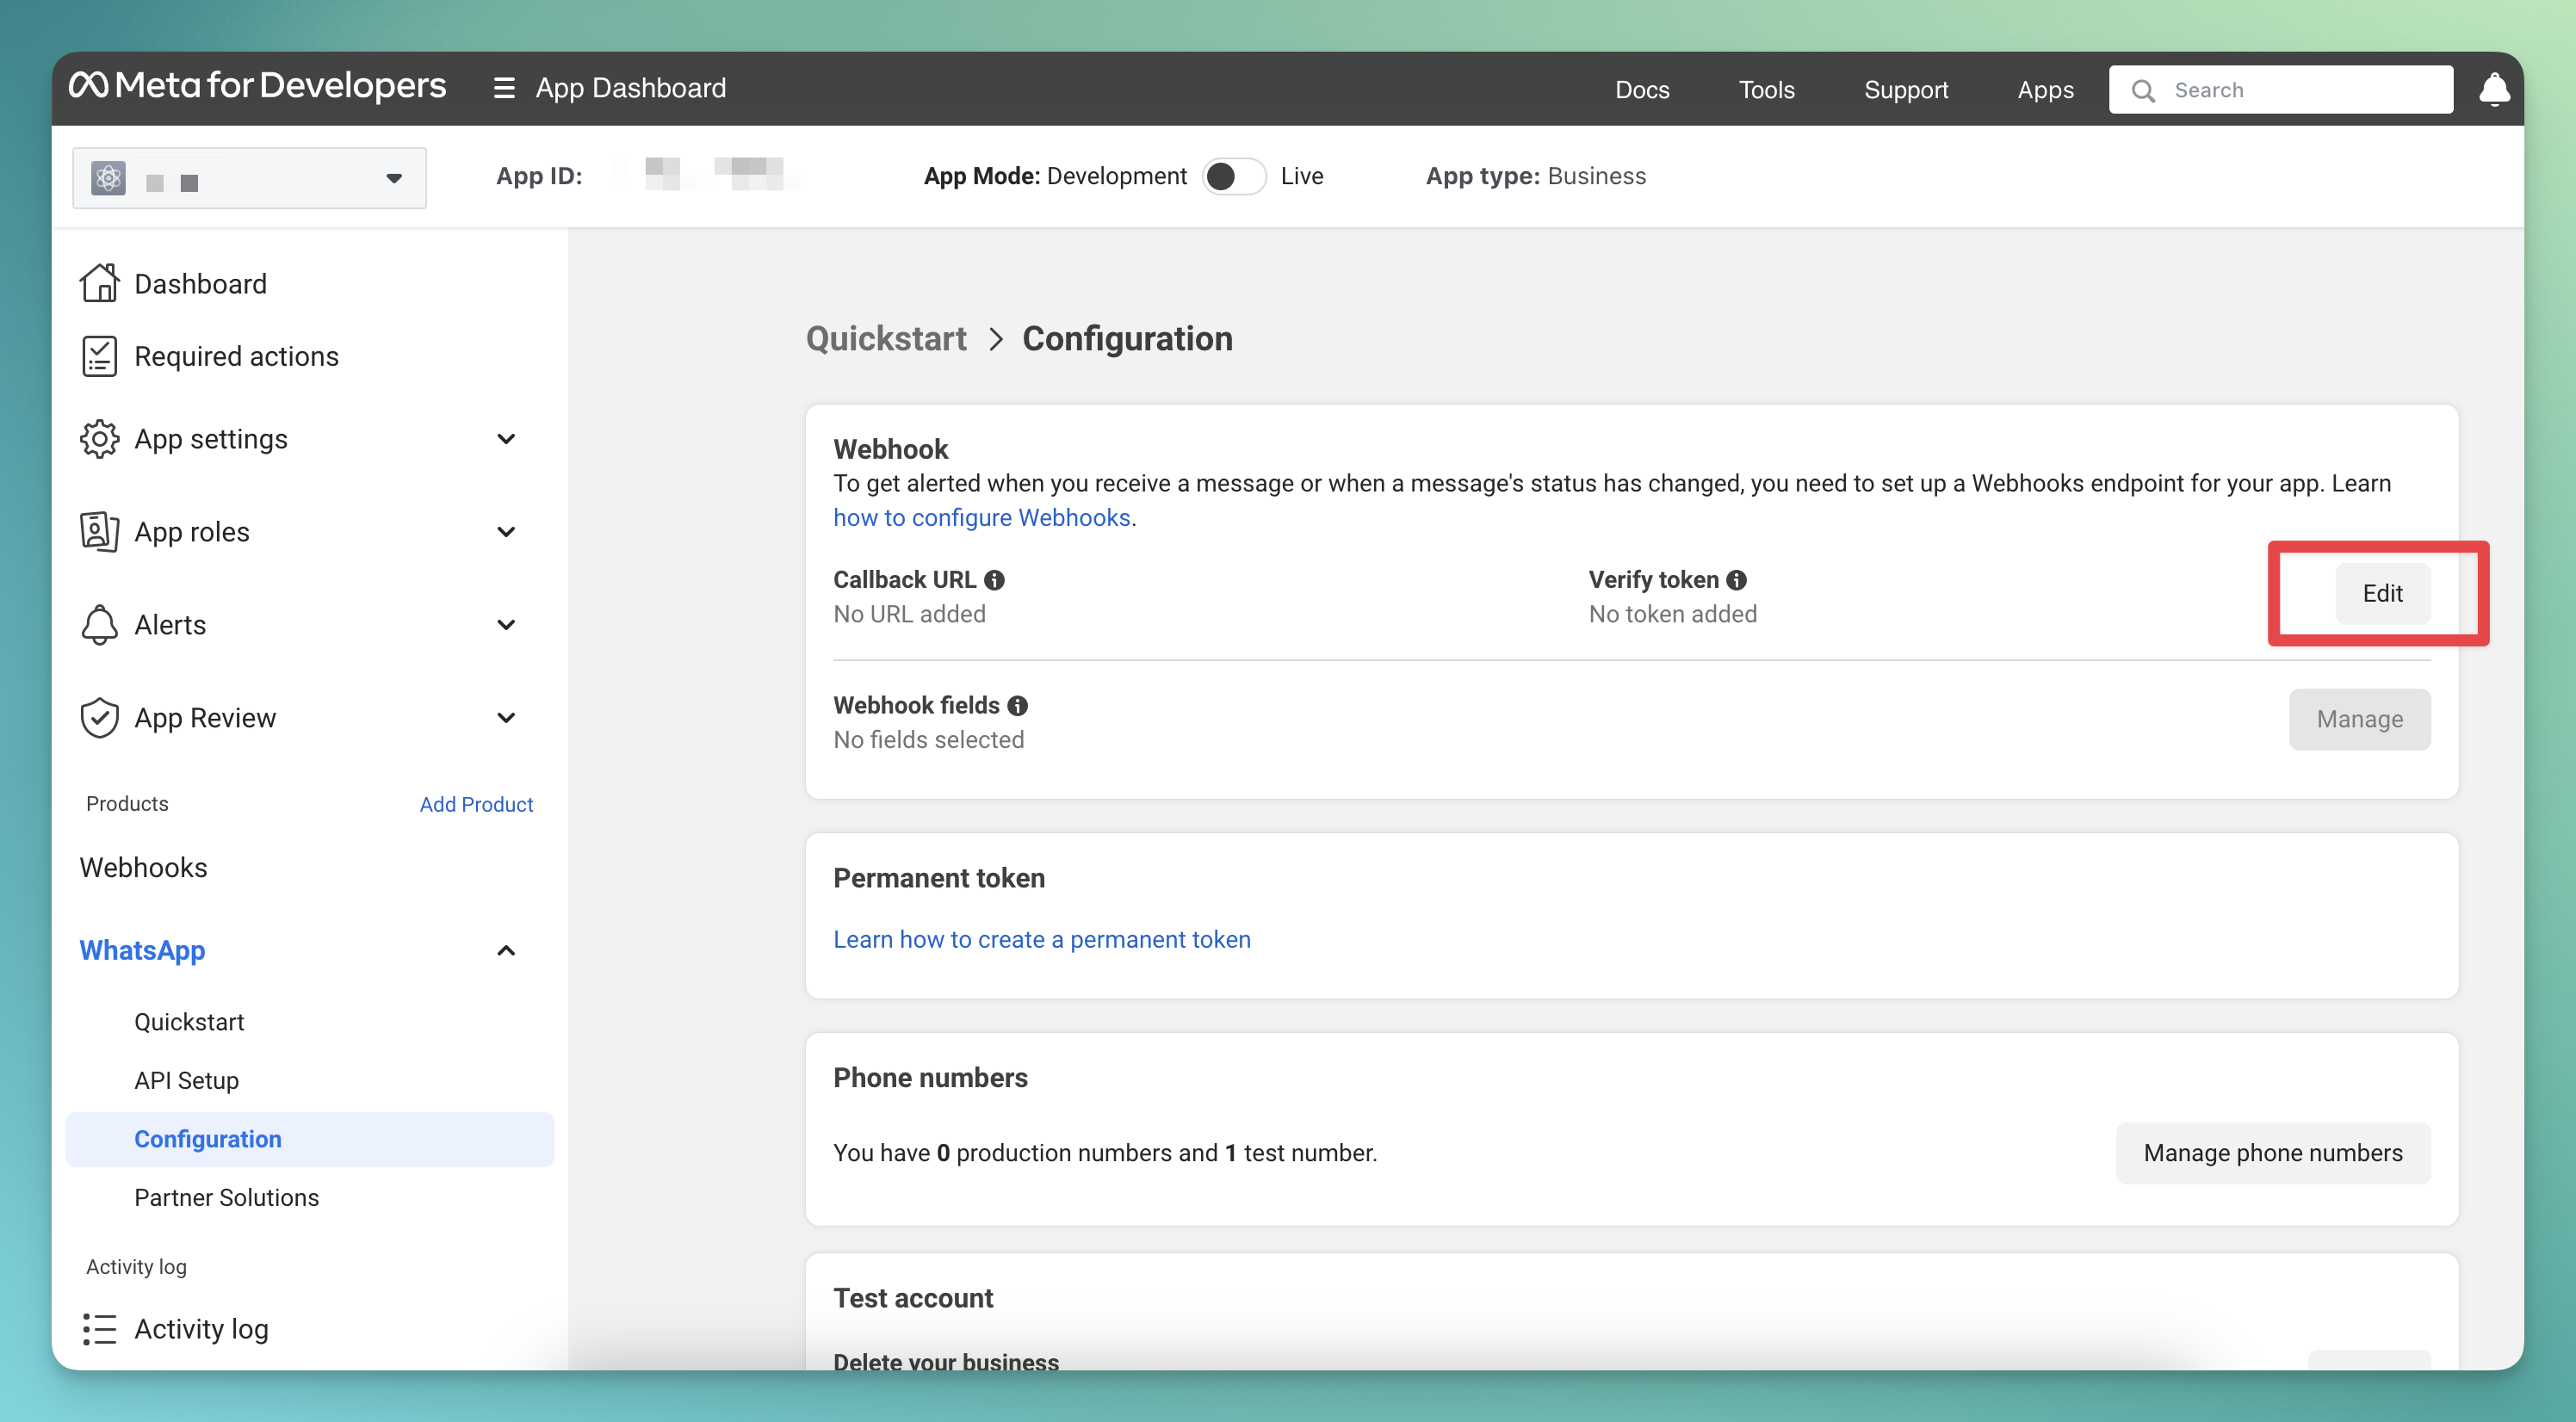 On the same page, locate the “Webhook fields”, then click the “Manage” button. This will open a popup to select the fields. Please choose all the fields (you may need to scroll down as well), and then click “Done.”
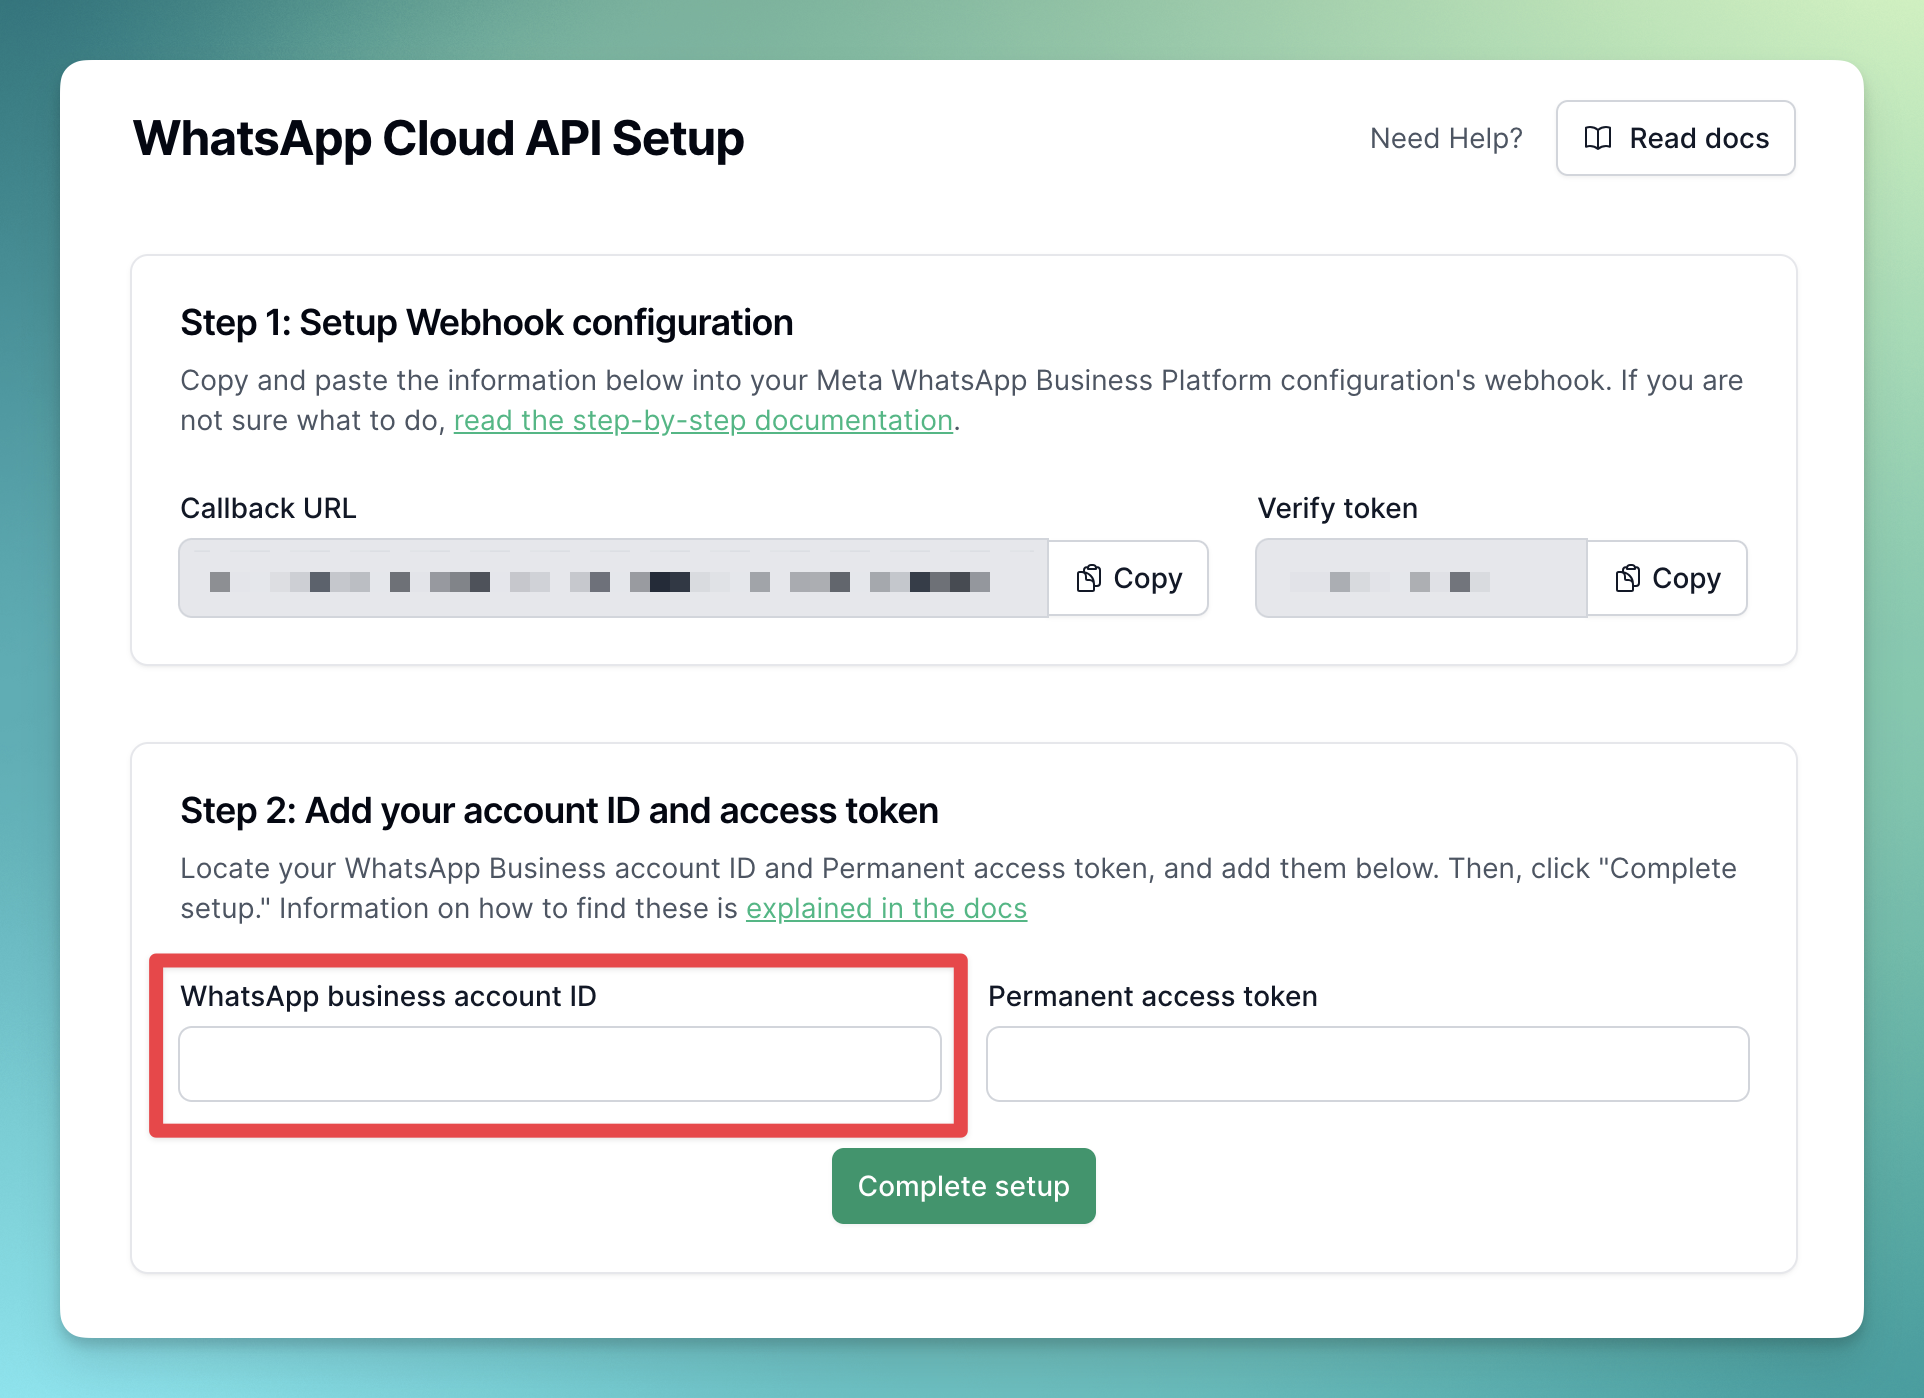
Step 4: Get your WhatsApp Account ID
Under WhatsApp -> API Setup, you will find your WhatsApp Business Account ID.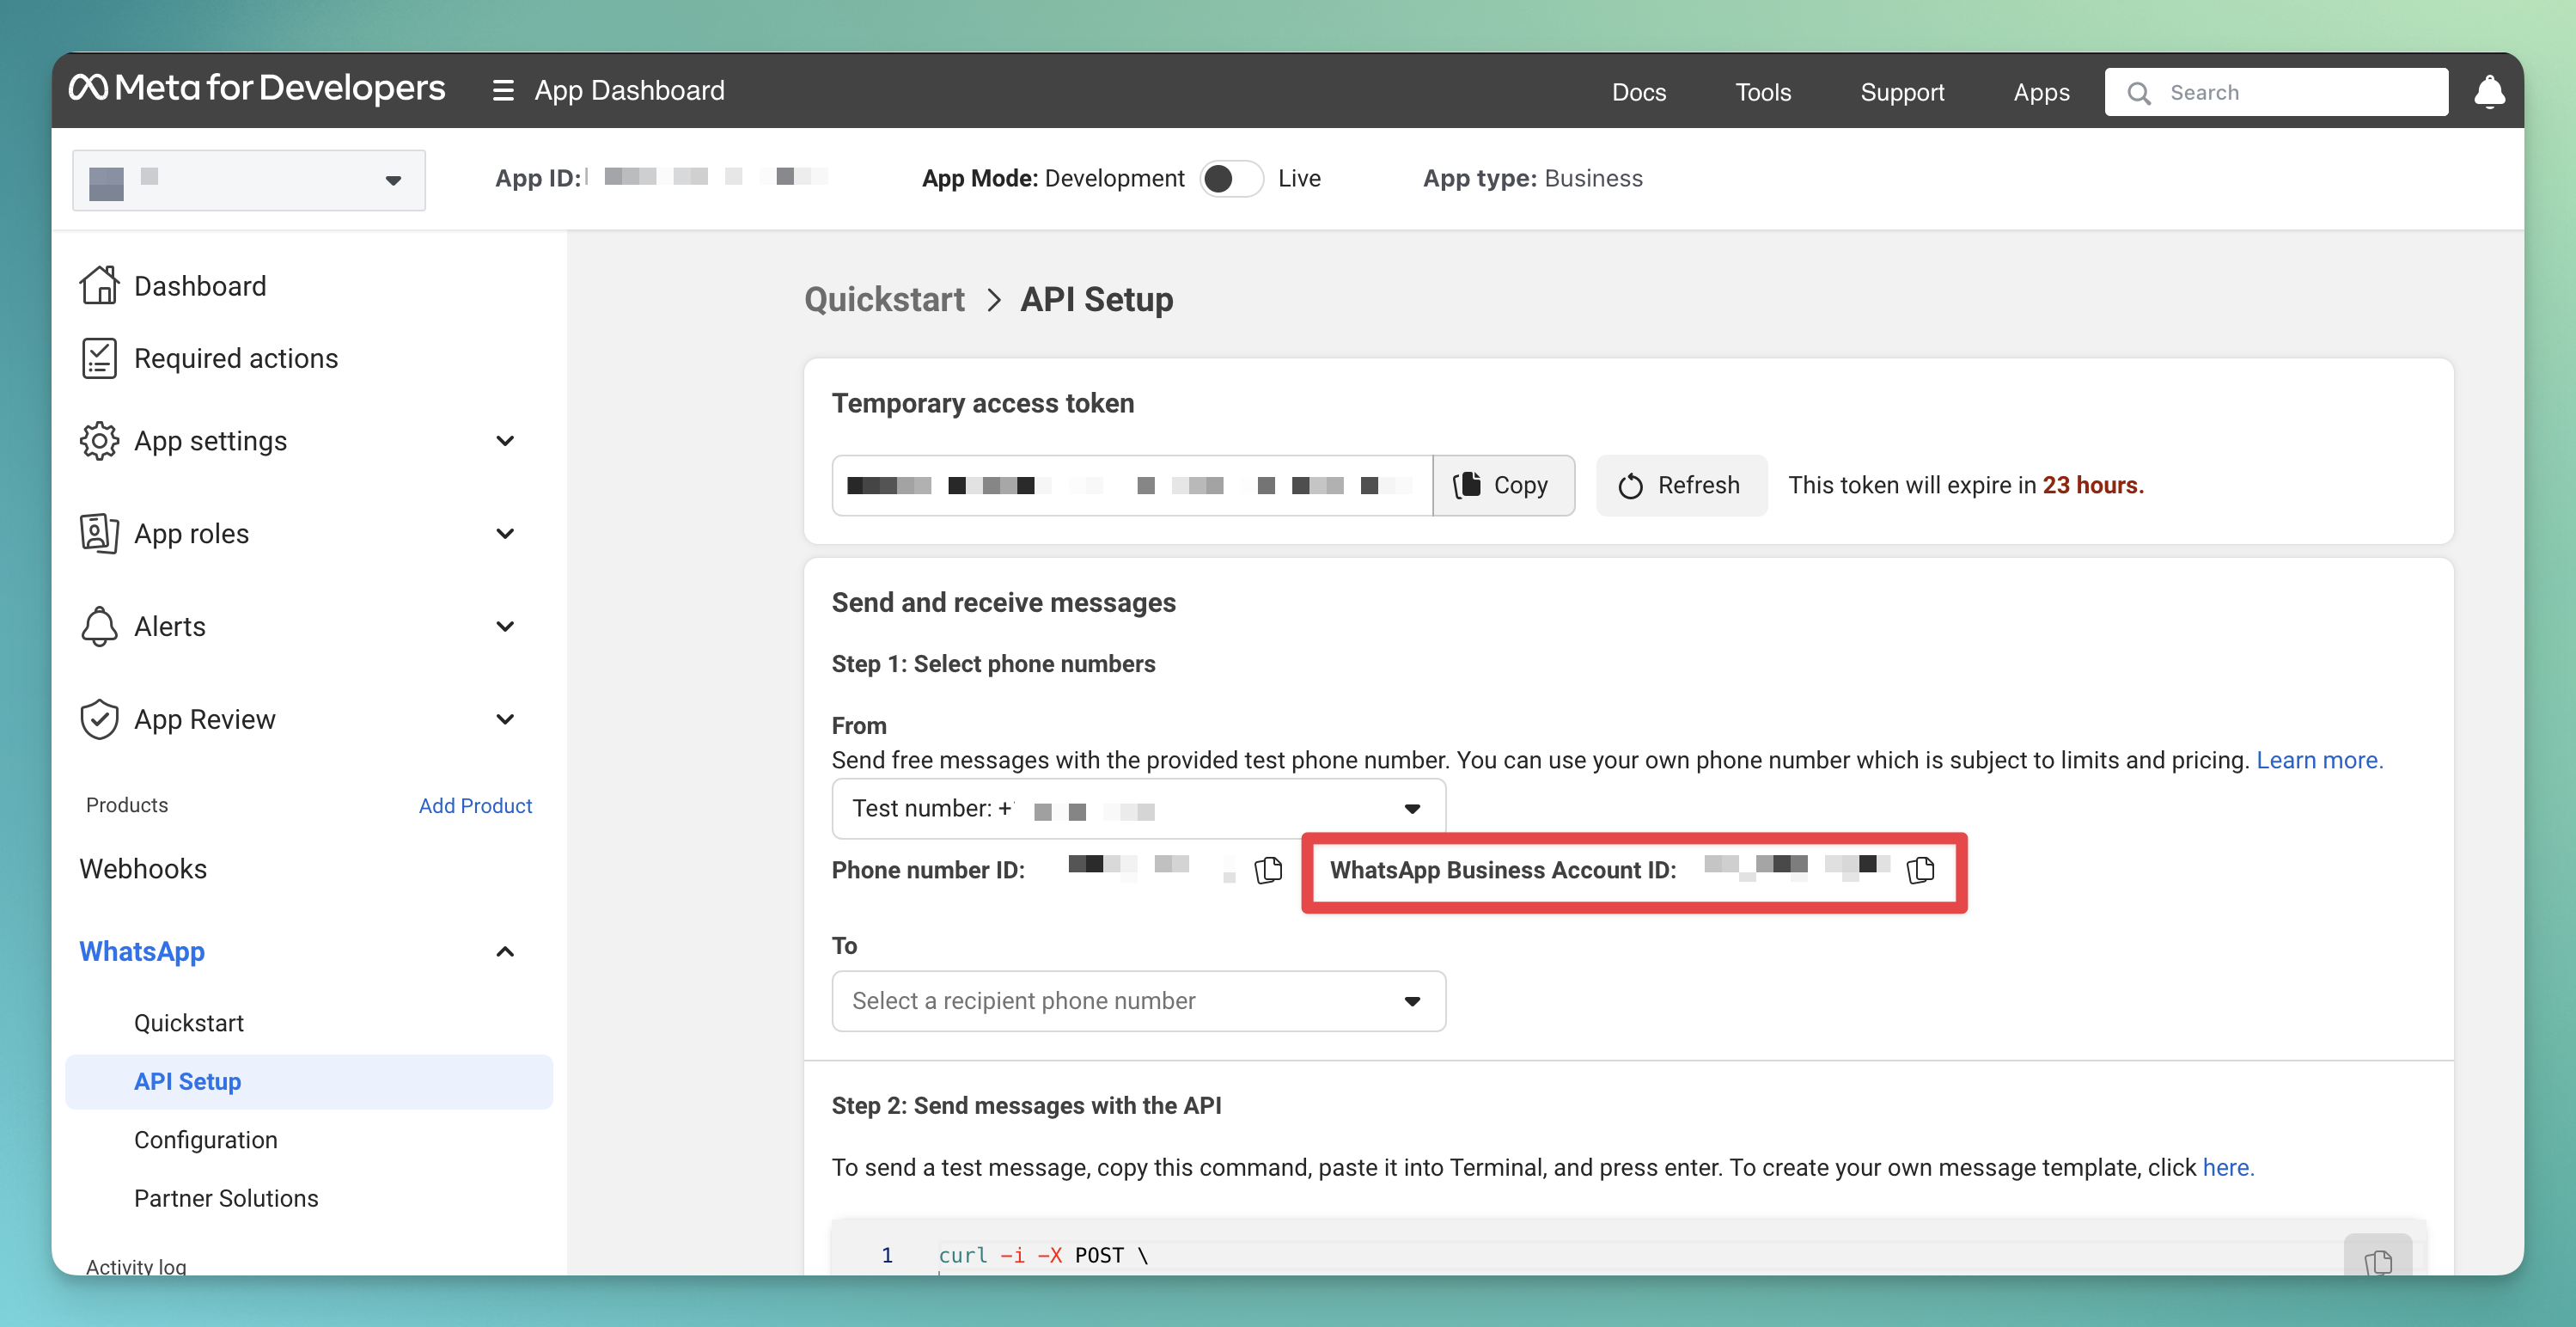 Copy your WhatsApp Business Account ID and enter it into the “WhatsApp Business Account ID” field as shown below.
Step 5: Get your Permanent Access Token
The process of creating a permanent access token is explained in detail in the Facebook Docs Here. Once you have the permanent access token, enter it in the “Permanent Access Token” field.